project 1 - part 1
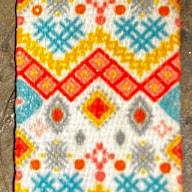
After importing an image of the pattern into Rhino, I landlocked it and got to cooking. I found out quickly that the pattern I had decided on was not symmetrical, and would have to eyeball the size of the shapes for myself. I choose to start by splitting the pattern down the middle, planning to work my shapes on one side and then mirroring the design to the other, finishing it off by trimming and tweaking the middle. I found that using the offset tools measurement memory could help me keep repeated measurements for the design when creating guidelines. I found that using guidelines helps with keeping things in line as well as making accurate scaling. By placing a line where you want the object to expand to, and starting the selection with a corner that you want it to stay, the line extra line gives you a place to lock onto without having to crunch any big numbers. I ran into some issues though with the hatching designs, with having it start and end where I wanted it to. My solution was to decide where the center would be and then place 45-degree lines, offsetting them outwards to then trim out a shape (bottom smaller hatching), as well as just finding a corner to build up from in a similar fashion (top big hatching).
Following the completion of my pattern, I tried to hatch out the shapes and add some color. I originally had a function of just tapping out the shapes I wanted one by one, which I wouldn't recommend. I found out though that you could just select the whole design to select out all the shapes you wanted by layer color, rather than going one by one. I did however run into an issue with the upper line hatching. The reason why the upper hatched lines don't hold a color is due to the hatching tool finding a self-intersecting loop and I have yet to find a solution for it.
- :) -


Comments
Post a Comment